Documentação Geral
Vale a pena relembrar

Vale a pena relembrar
API
API TaaS Determinação de perfil
Por Pedro Silva
Guia explicativo da API TaaS de Determinação de perfil, que permite verificar se o TaaS realizou a determinação de perfil corretamente.
Veja o conteúdo na íntegra acessando o link abaixo:
API - TaaS - Determinaçao_rev2.mp4
Cockpit
Complemento de Informações no Retorno
Por Fernanda Almeida
A tela de Complemento de Informações no retorno, foi criada com o intuito de complementar as informações de dispositivo legal no retorno do motor de cálculo ou do TaaS.
Dessa forma, o usuário pode criar uma determinada operação onde a regra já retorna os dispositivos legais correspondentes aos tributos da regra e o recurso de Complemento de Informações no Retorno complementa com as informações necessárias correspondente a cada tributo de acordo com o preenchimento pelo usuário, diretamente no resultado do cálculo requisitado no motor de cálculo ou no TaaS.
A rotina deve ser habilitada para o perfil do usuário no menu “Funcionalidades” do cockpit.
A manutenção das informações poderá ser feita através do menu:
- Mais Opções
- Complemento de Informações no Retorno
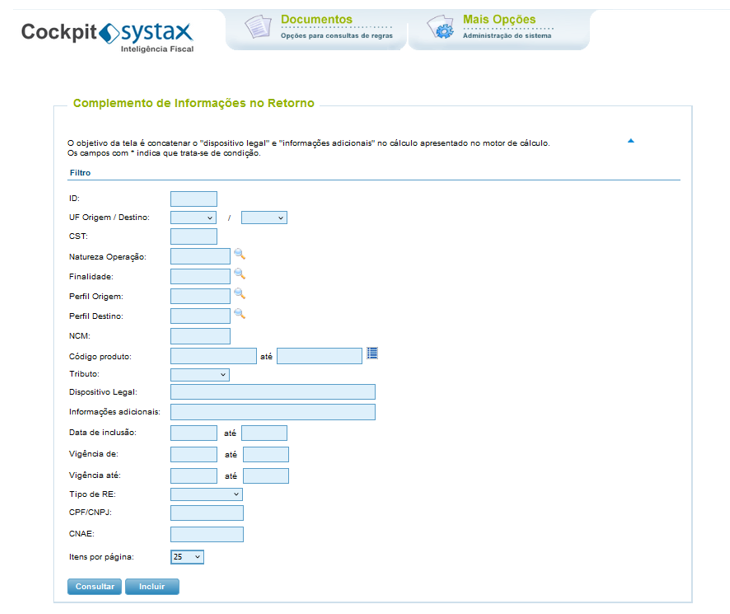
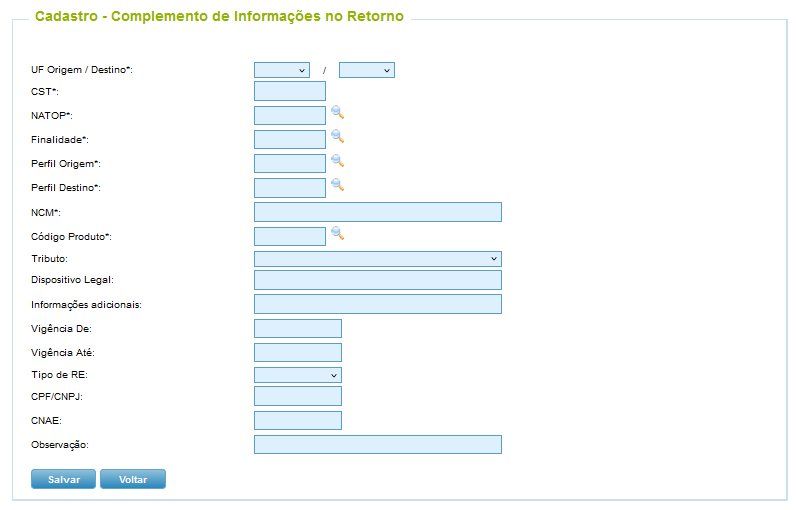
O usuário tem as seguintes informações de filtro na tabela:
ID – identificação do registro na tabela
UF Origem / Destino* – UF origem e UF destino da operação (por exemplo: SP, RJ, MG, etc)
CST* – CST da operação (por exemplo: 00, 10, 20, 30, 40, etc)
Natureza da Operação* – Natureza da operação do cenário (por exemplo: 108, 120, 121, etc)
Finalidade* – Finalidade do cenário (por exemplo: 43, 175, 569, 220, etc)
Perfil Origem* – Perfil do remetente da operação (por exemplo: 1, 2, 3, etc)
Perfil Destino* – Perfil do destinatário da operação (por exemplo: 138, 140, 3, 6, etc)
NCM* – classificação fiscal do produto (por exemplo: 19053100, etc)
Código Produto* – Código do produto definido pelo cliente
Tributo – Indicação do tributo o qual o dispositivo legal se refere (por exemplo: ICMS, IPI, etc)
Dispositivo Legal – Informação que será concatenada ao dispositivo legal já disponível na regra
Informações Adicionais – Informação
Data de Inclusão – Data que foi incluído o registro na tabela
Vigência de – Data inicial para concatenar as informações no retorno do cálculo
Vigência até – Data final para concatenar as informações no retorno do cálculo
Tipo do RE – tipo do RE a que se refere o perfil (por exemplo: total ou parcial)
CPF / CNPJ – Indicação do CPF ou CNPJ enviado na chamada do cálculo, serve tanto para a origem quanto destino
CNAE – Indicação do CNAE enviado na chamada do cálculo, serve tanto para a origem quanto destino
Todos os campos marcados com (*) são condições. Isto é, quanto mais condições forem inseridas no registro, mais limitada será a concatenação do dispositivo legal.
Para fazer a inclusão de um novo registro, basta clicar no botão  .
.
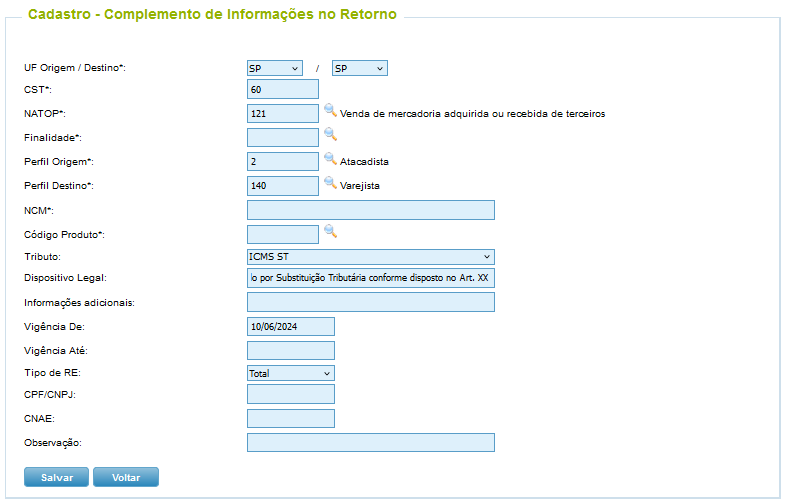
Abrirá a tela de inclusão, para a inserção de um novo registro:

Após o preenchimento das informações desejadas pelo usuário, basta clicar no botão  .
.
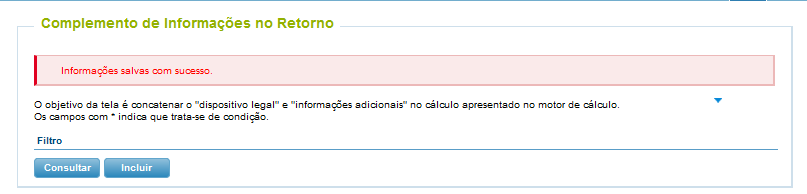
Após incluir o registro, o cockpit informa que as informações foram salvas e o registro fica disponível para consulta:


Além de fazer as inclusões de novos registros, é possível fazer a edição ou exclusão de um registro já inserido anteriormente, basta utilizar os botões  disponíveis do lado direito do registro.
O botão  permite que o usuário faça a edição de uma informação já inserida e com isso gere um histórico de informações.
O usuário tem a possibilidade de verificar o histórico das alterações feitas no registro através do ícone  :
:

O botão  permite que o usuário exclua uma informação inserida anteriormente e dessa forma, indisponibilize a visualização do registro.
>> Visualização da Informação concatenada no resultado do motor de cálculo ou no TaaS:
Após a inclusão do registro na tela, o usuário poderá fazer a requisição no motor de cálculo e verificar as informações que foram inseridas na tabela de Complemento de Informações no Retorno no resultado do cálculo:

Chamada:
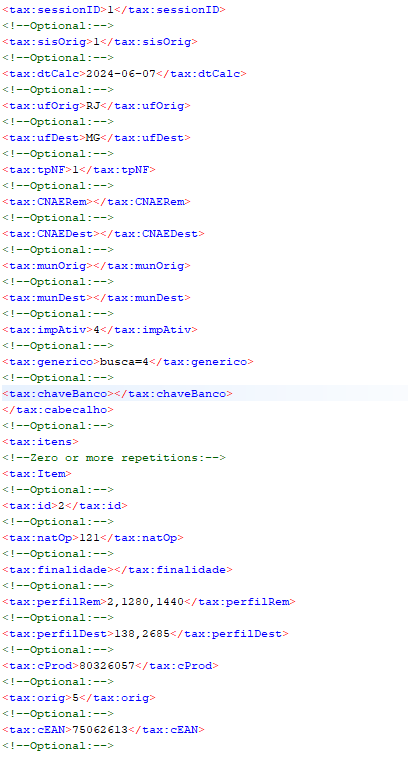
Resposta do motor:


Resposta do TaaS:

>> Conclusão:
O recurso é importante, pois a utilização da rotina dispensa a criação de regras gerais ou que possuam o mesmo resultado tributário e que podem ser utilizadas no cálculo variando apenas os perfis das chamadas.
GLPI
Como exportar relatório de chamados na ferramenta GLPI
Por Rafael Sena
A aba “visão global” da ferramenta GLPI é um recurso utilizado para ter uma visão geral de todos os chamados por tipo de status. Dentro de cada status tem várias possibilidades para localizar o chamado desejado, como por exemplo o filtro “Labels - Ferramenta”, onde você pode listar todos os chamados de uma determinada ferramenta.
Geralmente, este procedimento é utilizado para extrair relatórios ou fazer uma busca específica.
Como exportar relatório?
1) Acesse o site GLPI https://helpdesk.systax.net/glpi/front/central.php e filtre por “Home > Visão Global”.

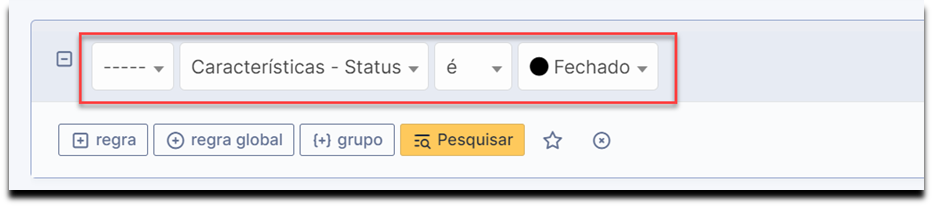
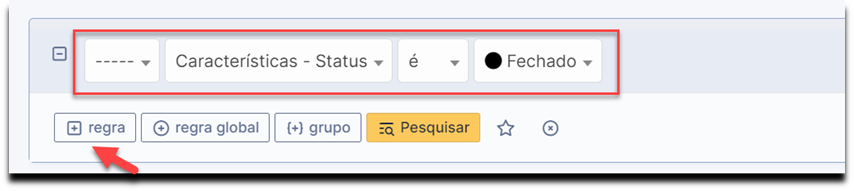
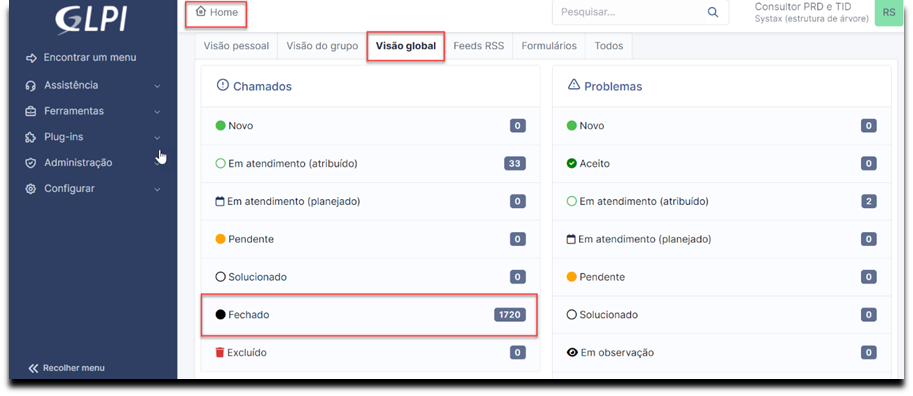
2) Para este caso, vou demonstrar como extrair relatório de chamados com status “Fechado”. Clique em “Visão Global”, selecione o status “Fechado”.

3) Acessando o campo Status, você encontra várias opções para localizar um chamado, no meu caso o filtro é pela ferramenta, pois preciso de um conjunto de chamados de uma determinada ferramenta, mas esse caminho funciona para outras opções, como por exemplo “Requerente”, dentre outras.
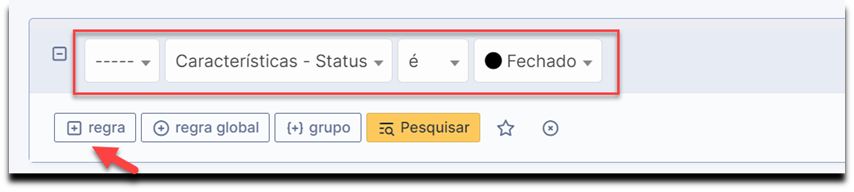
Para localizar por ferramenta, vamos acrescentar o filtro “Ferramenta”. Note que o primeiro filtro já foi inserido, pois no passo anterior foi indicado o status.
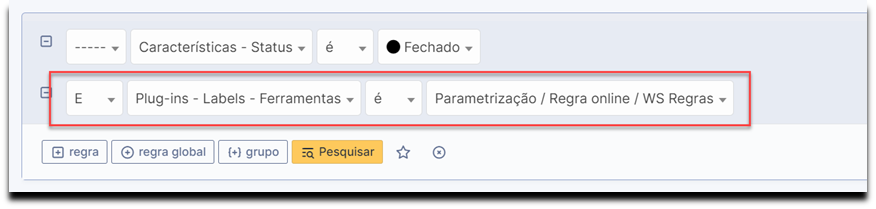
4) Clique na opção “+ Regra” e adicione o filtro “Características - Status > Plug-ins > Labels - Ferramenta” e selecione o tipo da ferramenta.
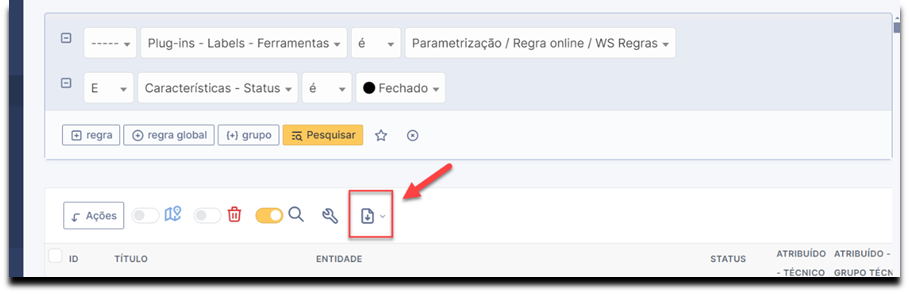
5) Com os filtros realizados, estamos prontos para extração do relatório. Logo abaixo dos filtros inseridos, você encontra algumas ações disponíveis que impactam na exibição das informações. Clique em “Exportar” e selecione a opção que melhor atender, tanto para extração da página atual ou de todas as páginas, quanto ao formato do arquivo.
A importância deste tópico é demonstrar, de forma prática, como exportar relatório de chamados fechados na ferramenta GLPI.
Worth remembering
API
TaaS API Profile determination
By Pedro Silva
Guide explaining how to use the TaaS API of Profile determination, which allows the user to verify if the TaaS tool performed the profile deterimnation correctly.
See the full content by accessing the link below:
API - TaaS - Determinaçao_rev2.mp4
Cockpit
Return Information Supplement
By Fernanda Almeida
The Return Information Supplement screen was created with the purpose of supplementing the legal device information in the return from the tax calculator or TaaS.
In this way, the user can create a particular operation where the rule already returns the legal devices corresponding to the taxes of the rules, and the Return Information Supplement feature complements it with the necessary information corresponding for each tribute, according to the completion by the user, directly in the result of the calculation requested in the tax calculator or in the TaaS tool.
The routine should be enabled for the user profile in the “Functionality” menu of the cockpit.
Maintenance of information can be done through the menu:
- More Options
- Return Information Supplement

The user has the following filter information in the table:
ID – log identification in the table
UF Origin/Destination* – UF origin and UF destination of the operation (for example: SP, RJ, MG, etc.)
CST* – CST of the operation (for example: 00, 10, 20, 30, 40, etc.)
Operation Nature* – The nature of the scenario operation (for example: 108, 120, 121, etc.)
Purpose* – Scenario Purpose (for example: 43, 175, 569, 220, etc.)
Source Profile* – Operation Sender Profile (for example: 1, 2, 3, etc.)
Destination Profile* – Operation Recipient Profile (for example: 138, 140, 3, 6, etc.)
NCM* – tax classification of the product (for example: 19053100, etc.)
Product Code* – Product Code defined by the customer
Tax – Indication of the tax to which the legal provision refers (for example: ICMS, IPI, etc.)
Legal Procedure – Information that will be linked to the legal provision already available in the tax rule
Additional Information – Additional Information
Inclusion Date – Date the entry was included in the table
Validity of – Start date to match the information in the calculation return
Validity until – End date for matching the information in the calculation return
RE type – the RE type the profile refers to (for example: total or partial)
CPF/CNPJ – Indication of the CPF or CNPJ sent in the calculation request, serves both the source and destination
CNAE – Indication of the CNEE sent in the calculation request, serves both the source and destination
All fields marked with (*) are conditions. This means that the more conditions are inserted in the register, the more limited the concatenation of the legal device will be.
To make the inclusion of a new record, just click the button  .
.
Opens the inclusion screen, for inserting a new record:
After filling in the information desired by the user, just click the button  .
.

After including the record, the cockpit tells you that the information has been saved and the record is available for consultation:

In addition to making the inclusion of new records, it is possible to edit or delete a record already previously inserted, just use the buttons  available on the right side of the registry.
The button  allows the user to edit an information already entered and thereby generate a history of information.
The user has the possibility to check the history of changes made in the log via the icon  :
:

The button  allows the user to delete a previously entered information and thus, prevent the viewing of the log.
>> Viewing the concatenated information in the calculator result or in TaaS:
After the inclusion of the record on the screen, the user can make the query in the calculator and check the information that was entered in the Table of Complement Information on Return in the result of the calculation:

Request:

Response of the engine:


Response of the TaaS:

>> Conclusion:
The resource is important because the use of the routine exempts the creation of general rules or that have the same tax outcome and that can be used in the calculation by variing only the profiles of the calls.
GLPI
How to export ticket reports in the GLPI tool
By Rafael Sena
The “overview” tab in the GLPI tool is a resource used to have an overview of all tickets by their status. Within each status there are several possibilities to locate the desired ticket, such as the “Labels - Tool” filter, where you can list all tickets for a given tool.
Generally, this procedure is used to extract reports or perform a specific search.
How to export this report?
1) Access the GLPI website https://helpdesk.systax.net/glpi/front/central.php and filter by “Home > Global View”.
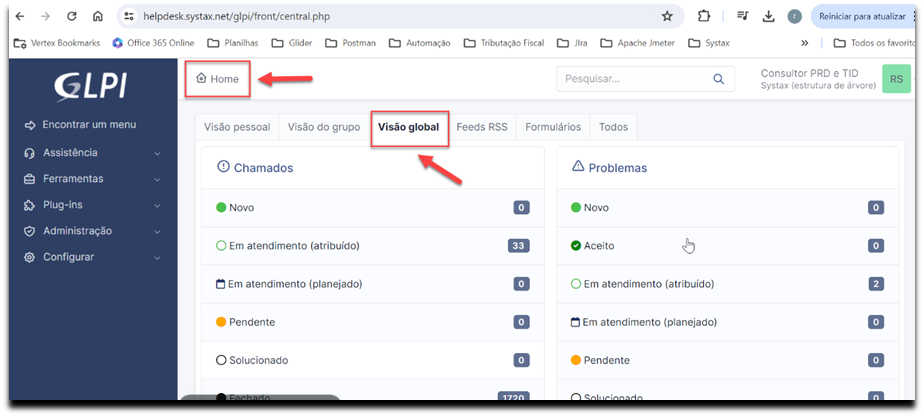
2) In this case, I will demonstrate how to extract a report on tickets with a “Closed” status. Click on “Global View”, select the “Closed” status.
3) Accessing the Status field, you will find several options to locate a ticket, in my case the filter is made by tool, as I need a set of tickets from a certain tool, but this path works for other options, such as “Requester”, among others.
4) To locate by tool, let’s add the “Tool” filter. Note that the first filter has already been inserted, as the status was indicated in the previous step.
Click on the “+ Rule” option and add the “Features - Status > Plug-ins > Labels - Tool” filter and select the tool type.

5) With the filters performed, we are ready to extract the report. Find below the inserted filters, you will find some available actions that impact the display of information. Click on “Export” and select the option that best suits you, both for extracting the current page or all pages, and for the file format.

The importance of this topic is to demonstrate, in a practical way, how to export a report of closed tickets in the GLPI tool.
| Versão do documento: 66 | Publicação: 6/28/2024 |